Youtube Instagram Facebook

Ichi Pestano

  • Home
  • Contact

Hello from Baguio!  We have time to kill before we head out for a quick night out, so here's another review.

By the way, I have already filmed a swatch video featuring my Colourpop liquid lipsticks.  They're just a handful but half of the shades, I'm really loving so please stay tuned!  Meanwhile, I'm gonna talk about my two lippie pencils.


The reason I got these was because I needed something to line my lips with when wearing bold colors.  However, I find myself using them more often as normal lipsticks.

These are priced at 5 bucks each and they weigh the same as the lippie stix ones. 

I'm not sure if all shades have an equivalent lip pencil partner.  What I only know is, the pencil version of a shade is not exactly the same color as with the lippie.  

Color

Dalia is a bold wine color and for me, a perfect combination of red and purple tones.  It' has a nice color payoff but I find it a bit streaky.  

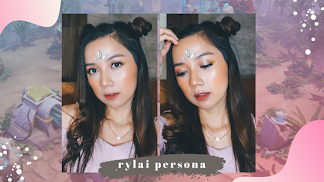
Frida is a bright peachy coral with hints of pink.  With one swipe, the you'd get a full, beautiful color.

Both shades are no longer available on the site, even their lippie stix version.


Application

The both glide like butter but Frida is smoother.  Dalia needs a bit more effort because again, it's streaky.

Also, in case you're wondering, Colourpop Lippie Pencils need a sharpener.


 Finish & Formula

Apparently, these appear more matte than my Lippie Stix in Creature.

Frida also looks velvetty.  I love it!


Lasting Power

The problem with Dalia is how it fades because it starts at the inner parts and since it's a dark color, that doesn't look pretty.

Frida is not long-wearing either but it's more manageable.


Dupe Alert

Frida has that peachy vibe of Celeteque's Nude and pink tones of LA Girl's Dreamy.  For Dalia, I didn't find a color dupe in my collection.


Between the two, I'm loving Frida waaaay more!  It's more wearable and I think it complements my skin tone better.


your sweetest drug,

Share
Tweet
Pin
Share
No comments

If I didn't sort my stuff last week, I wouldn't realize that I have a few skincare items from this brand because I didn't buy them all at once.  Well maybe, it just shows how interested I am in trying Innisfree products.  Plus, I also admire their environmental advocacy.

Now, it's time to talk about them in one post!


Eco Safety UV No Sebum Sunblock

I got to visit their store in Shanghai and I think I spent at least 30 minutes there checking out the products.  Funny thing, I only purchased one - this sunscreen.  😁

Instead of the strong sunblock scent, it has a citrusy fragrance.  It also contains sunflower oil and green tea.


It claims to control excess sebum production but I haven't noticed a significant difference yet.  Maybe it's because I use other products on my face and it's hard to tell which one contributes the most.  If I use it alone, it gives a demi-matte finish but it still feels slightly greasy when I touch it since it there's oil in the formula.

It's a nice everyday sunscreen and I think I can also use it when I'm at the beach or if I'm doing any outdoor activity.  A big watch-out though is the white cast it gives but other than that, I'm enjoying this because it feels pretty comfortable and it doesn't give me any irritation.  My face tends to hate sunscreen but this one works well.


Jeju Volcanic Pore Clay Mask

Here's one of Innisfree's most raved about products.  Actually, I believe everything in their Jeju Volcanic line is a hit!


This is the OG version and the other one called Super comes with a brown cap.  According to the brand site, Super can treat pores much better and OG is better in controlling grease.  Essentially, formula is similar and even the price too, so just pick one depending on the severity of your pore problem.

Btw, Kris bought this in Seoul last year for 12000 KRW or about 500++ php.


See?  Even for packaging, they're using biodegradable materials.  They're using soy as ink too!  Mother Earth would feel glad!  🍂


It's easy to spread all over the face.  It actually feels like you're putting icing on.  Haha!  

It leaves my skin feeling soft and extra clean.  There's no super tightening effect after rinsing it off.  

I haven't noticed any dramatic effects in terms of pore size so I'm thinking of using this at least twice a week but overall, I'm impressed.


Seaweed Capsule Recipe Pack

I got this for only 125 php on BeautyMNL.  

This wash-off mask comes in different variants and each one targets a specific skin concern.  I got Seaweed, a key ingredient for skin brightening as it is packed with Vitamin A and C.  


I initially thought it's only for one-time use since it's in a capsule type of packaging and it only contains 10ml of product, but no, you can actually use it at least 5 times.

I gotta admit, the heating effect freaked me out at first but later on, I loved it because it felt like a spa.  It's relaxing and it seems like the nasty dirt in my pores are melting away.  


I also thought that it's in clay formula, but it's actually gel-like.  I love that it's not messy to apply because it doesn't slide off the face.  There's no weird scent as well.

In terms of effect, it's similar with the pore clay mask above in a way but again, this variant is more for skin brightening.  Plus, it makes the skin really supple and refreshed.

It's Real Squeeze Mask in Rice and Manuka Honey


Innisfree is also known for their mask sheets.  I can recommend any variant.

I got these two from an online seller.  Rice is for brightening as well while Manuka Honey is for hydration.  

Key thing to know about this mask line is that, the sheet is thicker than the common ones and they made it that way to be able to lock the moisture in the skin.

I also find these greasy after the application.  It's like there's a serum on my face after I take the sheet off.

So, that's all!  Let me know in the comments below your favorite Innisfree products! 


What do you think?


your sweetest drug,

Share
Tweet
Pin
Share
No comments

Here's how you can create double eyelids without the scary surgery.  No blood, painless and definitely no need for any scalpel!  Haha!  So, if you're ready to watch just click the link below.  😉

Watch it here!


As you can see, the fold of my eyes are not that prominent.  They're small and they look uneven most of the time.  For some weird reasons, I also wake up with a bigger fold on only one side sometimes.  That's why for me, discovering this technique was like the next best thing since sliced bread.  

I could now even out my eyes instantly and effortlessly.  Some eye makeup I do can also look better now.  

In the video, I used two tools but again, I prefer eyelid glue.  


I got the stickers from Landmark.  One pack with 30 pairs costs only 60 php.  These are one-sided.  I believe there are double-sided ones and others that are more transparent or in skin color.

The fold stays, same with the glue if I let them sit on my lids for couple of hours but big problem is that, these stickers are too visible with or without makeup.


I then discovered that there's a thing called eyelid glue through one of Pony's video (she's my favorite).  Coincidentally, I bought this eyelash glue from The Face Shop and I found out that it could also be used as an eyelid glue.  It even comes with the fork-ish thing that's supposed to be used when folding the lids.

Since then, I ditched the stickers.  Haha!  But if ever there's a better version of those from other brands, I won't hesitate to try.


I hope you find this helpful!  If you are one of those who are frustrated about their monolids, hooded lids or uneven eyes, let me say to you that there's still hope.  Haha!  😃  

Lastly, if you are new to this double eyelid thing and don't know yet where to place the glue/sticker, just try to find the right spot using the fork-ish thing or as what I suggested, a hair pin then, mark it by using a light colored eyeliner.  If you're happy with the size of the fold, that's it!  If not, adjust. 

after and before

You can always do the marking first until you get used to it.  It just takes practice!  You got this!


What do you think?

Please show some love by hitting the like and subscribe button!  If you got here first before the video, comment any emoji on Youtube.  Hihi!


your sweetest drug,

Share
Tweet
Pin
Share
No comments

I have already featured my dear palette in my "My Squad Does My Voiceover" makeup video and I know this review came in so late.  Sorry!  ✌

I bought this baby as a gift to myself after contemplating so much which one to really get.  I was torn between this and Too Faced Chocolate Bar palette because that's highly recommended as well.  It just so happened that when I was so ready to buy, I saw a good deal on Lorac Pro so I was like "here, take my money".  Hahaha!  😜


The first time I opened and swatched it, I was shrieking inside because it's so beautiful.  The packaging feels like a cardboard yet it is sleek, lightweight and slimmer compared to most palettes.

It also comes with a small primer and a mirror.


There are 18 colors inside and it's a mix of mattes and shimmers.  The top row is an all-matte team except White and Light Pink which both have very tiny glitters.  The bottom row is a gorgeous set of shimmers and a few of them almost have a metallic feel.

The pigmentation is amazing.  It didn't disappoint when I first tried it.  With one swipe, I could see the full color and they're just so stunning, except for the 3 lighter colors because they seem like pure powder.  It's fine though since I only use them as a base to set the primer/concealer on the lids or when highlighting the brow bone.


The formula is soooo delicious.  Haha!  Not that I tasted it.  😃

It feels very buttery and velvety.  The texture is so smooth and it goes on very soft.


I can totally create various eye makeup looks from natural to smokey because there are neutral browns and some bolder shades as well.  Also for me, a gold color is a necessity because it can really add some oomph to any look and a great palette should come with a black shade as well.


I haven't tried using the eye primer but I heard it's good.  Well, these eyeshadows are long-lasting on their own.  Maybe applying the primer underneath would even prolong the wear time.

I'll use the primer on my next makeup video!


Colors

White 
- matte, powdery (almost chalky) and has tiny glitters
- my least favorite but I can use it on my brow bones instead
- comes off colorless unless you really pack it on

Cream
- matte but doesn't feel chalky
- looks almost exactly like White on medium skin sans the glitters
- perfect to use when setting the primer/concealer
- a perfect base color

Taupe
- matte medium brown
- can be used as contour powder or transition shade

Light Pink
- similar to White but more opaque (pale pink)
- less chalky than White
-  has lesser glitters than White
- can be used as a base color


Mauve
- a perfect matte mauve color
- very pretty when used all over the lids or on the crease

Sable
- a chocolate matte brown color
- can be used to deepen the outer corners or crease
- can be used as a transition shade for darker eye makeup looks

Espresso
- a dark, rich matte brown, coffee bean color
-  can be used to deepen outer corners
- can appear as almost black if packed

Black
- an intense matte black 
- can come off a bit patchy if blended by a brush


Nude
- can double up as a pale pink highlighter
- can be used on inner corners as well

Champagne
- even lighter then Nude but not as smooth
- can be used as a highlighter because of the nice sheen
- its glitters are more noticeable than Nude's

Gold
- looks like a metallic copper than gold color when applied
- looks gorgeous on the center of the lids

Light Bronze
- a dark frosty champagne color
- can be used as a highlighter for deeper skin tones
- perfect to use if you want some sheen on the lids without a pop of color


Pewter
- looks like a slightly darker taupe with a frosty finish
- can be used on the outer corner or crease

Garnet
- a medium metallic copper/brick color
- can be used on the crease or lids as a pop of color

Deep Purple
- looks black when applied but it's a rich, deep plum color
- looks like satin with tiny glitters
- can be used to deepen outer corners

Slate
- a cool-toned blue gray with glitters
- can be used on the lids as main color or outer corners


By the way, I used my fingers when I swatched them.  Here's a close-up photo.  


Like I said, most of them are ultra-pigmented on their own so even with primer underneath, the color still comes off very rich.


I'm really in love with Lorac Pro 1!  I can't believe it took me forever to get a new palette.  Haha!  😏

If I were to choose my favorite colors (even if it's hard for me), it would be Taupe, Mauve, Gold, Light Bronze, Pewter and Garnet. 

I'll be doing more looks using this palette so stay tuned!  For now, check out these photos from the makeup video I did recently.


Garnet looks stunning when paired with Gold.  


Here's a more neutral look.  I think I only used Pewter here.


I doubt that I'd be wanting and needing another palette anytime soon.  Maybe when I hit pan on my favorite colors, that's the only time that I would look for a new one.  For now, the color combination is enough for me because I have what I need to create my everyday makeup.  Once I experiment on more looks, I would definitely re-consider and maybe try a few other ones.  

What do you think?


your sweetest drug,

Share
Tweet
Pin
Share
No comments

I hope you're having a relaxed holiday so far.  Mine involves normal work, blogging, editing and binge watching (hopefully haha 😊).

Anyway, I'm gonna talk about my two liquid lipsticks by the Sleek Makeup.  I think it's a UK brand and they made it to PH beauty scene in late 2015.

When I bought the Face Contour kit, I couldn't help but also cop a liquid lipstick.  I didn't get the best-selling Birthday Suit because it looks similar with LA Girl's Dreamy.  Of course, I could be wrong but besides that, it seems that everyone has that shade and I'm not really a type of person who usually fall for the hype.  Nevertheless, you already know that I'm collecting liquid lipsticks so I just had to try the formula myself.


The light as air texture provides you with comfortable wear for hours, that doesn’t cake, flake or dry out, ensuring long lasting colour all day. - sleekmakeup.com


Color & Finish

The one I bought along with the contour kit is Shabby Chic.  It's described as a muted dark pink.  It looks mauvy and it has more hints of purple than pink.  It's a great MLBB type of color and it complements medium skin well.  However, I find that it doesn't brighten up the face that much.  

I'm not sure why it looks a bit red here.  Maybe because of the lighting.  😒


Then, I got another tube during Lazada's Revolution Sale.  From the regular price of 450 php, I got it for 399 php.

The next shade is called Velvet Slipper, which is described as a muted deep plum.  It's a gorgeous dark berry color and I bet it looks good on deeper skin tones.  It's something that Rihanna would wear! 😉


Pigmentation-wise, they're both amazing.  One swipe would give you a full color and once they dry down to a matte finish, they would get a little darker.

They also give me a brighter smile.


Application

Its doe-foot applicator is a bit smaller but it still has that nice slanted shape that helps draw the outline.


Velvet Slipper is trickier to apply than Shabby Chic because obviously, it's a dark color and it would require more effort.  To be honest, I haven't succeeded making a very neat full lip with it.  Even when I took these photos, I had to re-do everything for 3 friggin' times!  And so far, that's the best I can do.  Haha!  😁

Formula

Matte Me has a subtle glue-ish scent but it also goes away fast.  So yea, you can consider it scentless. 

The consistency is thicker compared to the other liquid lipsticks I have.  It's almost moussy.  I also find that it's faster to dry and that makes the application of Velvet Slipper much worse.


So what usually happens is, the first swipe I do will already dry down even before I'm done evening the layer out.  When I try to work on those uneven areas, it gets streaky and it becomes harder for me to spread and blend everything.  Ugh.  😭

That's why most of the time, I don't even attempt to do a full lip and just do one swipe.  Then, I'll quickly put my lips together to blend and use a brush to feather out the outline.


I'm not sure if you can also tell but they look so dry on the lips.  There's a little shine on Shabby Chic but that's only because I put a generous amount of lip balm prior.

The formula feels a bit heavy but they're still comfortable to wear as they are not tacky.  


Here, I tried to mix the two and the result is just a darker version of Shabby Chic.  When it dried down, I couldn't tell the difference.  Haha!  😄

Lasting Power

I gotta say, they're both budge-proof unless you really rub your lips during a meal or with a very good makeup remover of course.  The inner part crumbles first but in a not so annoying way.  


Dupe Alert

I only found one color dupe and it's for Shabby Chic.  

I love this lippie by EM Cosmetics but I know she needs to retire now because she's already two years old.  She needs to go to my "I don't want to let you go but I need to take you out now from the rotation" box.  😭


Overall, I can look past the tricky application and fast-drying formula because I love the colors and the fact that it's not sticky on the lips.  

Between the two, I'm really digging Velvet Slipper more.  I swear.  It's bold yet still wearable.  You can pair it with only mascara and white eyeliner for eye makeup.


I also wanna share this photo because I did Mem Angel's makeup and I used Shabby Chic on her.


How about you?  What's your favorite Matte Me shade aside from Birthday Suit?  


Like Sleek Makeup Philippines on Facebook.


your sweetest drug,

Share
Tweet
Pin
Share
No comments
Newer Posts
Older Posts

Hi! I'm ICHI.

Hi! I'm ICHI.
Join me as I do what I love to do, post it here and share it to the world.

Shoot a Message

For collaborations, product reviews, giveaways, product features, etc., email me at pestanomichiko@yahoo(dot)com

Follow Me

  • Youtube
  • Instagram
  • Facebook

Click Me for a Random Post!

Latest Video

Latest Video

Spread the Love

Sparkline

Blog Archive

  • ►  2022 (3)
    • ►  May (1)
    • ►  February (1)
    • ►  January (1)
  • ►  2021 (8)
    • ►  December (1)
    • ►  August (1)
    • ►  July (1)
    • ►  May (1)
    • ►  April (2)
    • ►  March (1)
    • ►  February (1)
  • ►  2020 (18)
    • ►  December (1)
    • ►  November (1)
    • ►  October (1)
    • ►  September (1)
    • ►  July (2)
    • ►  June (1)
    • ►  May (3)
    • ►  April (1)
    • ►  March (2)
    • ►  February (3)
    • ►  January (2)
  • ►  2019 (29)
    • ►  December (3)
    • ►  November (2)
    • ►  October (1)
    • ►  September (1)
    • ►  August (2)
    • ►  July (2)
    • ►  June (3)
    • ►  May (3)
    • ►  April (4)
    • ►  March (3)
    • ►  February (2)
    • ►  January (3)
  • ►  2018 (28)
    • ►  December (3)
    • ►  November (1)
    • ►  October (4)
    • ►  September (3)
    • ►  August (2)
    • ►  July (2)
    • ►  June (1)
    • ►  May (4)
    • ►  April (1)
    • ►  March (3)
    • ►  February (1)
    • ►  January (3)
  • ▼  2017 (66)
    • ►  December (4)
    • ►  November (1)
    • ►  October (4)
    • ►  September (3)
    • ►  August (7)
    • ►  July (5)
    • ►  June (6)
    • ►  May (6)
    • ▼  April (8)
      • Colourpop Lippie Pencil in Dalia and Frida
      • One Brand Review - Innisfree Skincare
      • How to Create Double Eyelid + Tips
      • Lorac Pro Palette 1
      • Sleek Matte Me Liquid Lipstick in Shabby Chic and ...
      • Althea Beauty Box Unboxing - Green and Yellow!
      • Colourpop Lippie Stix in Creature
      • Hair Fairy Dry Shampoo
    • ►  March (8)
    • ►  February (7)
    • ►  January (7)
  • ►  2016 (81)
    • ►  December (9)
    • ►  November (6)
    • ►  October (8)
    • ►  September (3)
    • ►  August (9)
    • ►  July (7)
    • ►  June (3)
    • ►  May (6)
    • ►  April (7)
    • ►  March (8)
    • ►  February (7)
    • ►  January (8)
  • ►  2015 (124)
    • ►  December (9)
    • ►  November (9)
    • ►  October (9)
    • ►  September (8)
    • ►  August (12)
    • ►  July (9)
    • ►  June (10)
    • ►  May (12)
    • ►  April (11)
    • ►  March (12)
    • ►  February (10)
    • ►  January (13)
  • ►  2014 (131)
    • ►  December (15)
    • ►  November (12)
    • ►  October (9)
    • ►  September (7)
    • ►  August (12)
    • ►  July (11)
    • ►  June (13)
    • ►  May (7)
    • ►  April (12)
    • ►  March (9)
    • ►  February (12)
    • ►  January (12)
  • ►  2013 (131)
    • ►  December (8)
    • ►  November (5)
    • ►  October (8)
    • ►  September (10)
    • ►  August (11)
    • ►  July (9)
    • ►  June (15)
    • ►  May (12)
    • ►  April (9)
    • ►  March (11)
    • ►  February (16)
    • ►  January (17)
  • ►  2012 (129)
    • ►  December (14)
    • ►  November (15)
    • ►  October (10)
    • ►  September (8)
    • ►  August (5)
    • ►  July (8)
    • ►  June (5)
    • ►  May (5)
    • ►  April (6)
    • ►  March (18)
    • ►  February (13)
    • ►  January (22)
  • ►  2011 (37)
    • ►  December (27)
    • ►  November (10)

Get 950 php off on Airbnb!

Get 950 php off on Airbnb!
Sign up by clicking here.

Click here to get 200 php coupon!

Click here to get 200 php coupon!
Facebook Youtube Instagram

Created with by BeautyTemplates | Distributed By Gooyaabi Templates